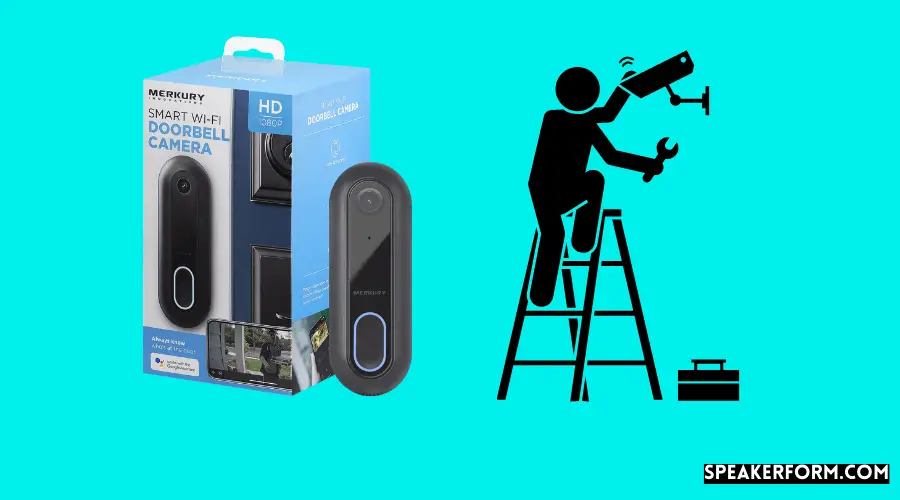
One afternoon, I wandered down the vegetable aisle of my neighborhood Walmart, where I was shopping for groceries.
My thoughts were preoccupied because it had been a very hectic day. However, I found that my legs had led me to the technology section, where my gaze fell upon the Merkury Smart WiFi Doorbell Camera, which I had never seen before. My interest had been peaked.
I have some opinions as a self-proclaimed “Smart Home nerd” who has experimented with doorbells of all kinds and sizes.
I was as excited as a child with a new toy when I got to try out this new doorbell. My doorbell circuit was not separate, but in my tinkering adventures, I’d managed to install video doorbells from Ring, Nest, and SimpliSafe, among others, all without the need for an existing doorbell, so I was rather confident in my abilities.
Unfortunately, there wasn’t much documentation on the Merkury Smart WiFi Doorbell, which made the research process more difficult than I’d anticipated.
Despite this, I liked the task, and I could complete it in a few days.
The Merkury Smart WiFi Doorbell Camera is a moderately priced and feature-rich doorbell that can be integrated with smart assistants such as Google Assistant and Amazon Alexa, among other things.
The Geeni app, which is compatible with the device, also has weatherproofing, night vision, and motion sensors that send you real-time notifications on your phone when something moves.
Even though the smart doorbell is designed to work with an existing doorbell system, you can install it even if you don’t already have a doorbell system in place using a simple and cost-effective workaround.
If you want to install a Merkury smart WiFi doorbell without first installing a doorbell system, you can use an indoor power adaptor that meets the voltage needs of the device to accomplish this.
I highly suggest the OhmKat Professional Video Doorbell Power Supply, which has proven to be reliable in my experience on numerous occasions.
Merkury Smart WiFi Doorbell Voltage Requirements
As previously stated, the Merkury smart WiFi doorbell is intended to be used with an existing doorbell system.
If you follow the recommended installation procedure, you will have to hardwire the device with the cables that link to the analog doorbell for it to work.
As a result, it must be linked via cables that can supply an alternating current between 16-24 V and a minimum power of 10 VA, respectively. Please keep in mind that these specifications are for North America.
If you live in Europe, you will need to hunt for an adaptor that can produce an alternating current between 12-24 V and a minimum power of 8 VA at a minimum price.
Using an indoor power adapter, also known as a plugin transformer, we will eliminate the requirement for the existing doorbell and wire. A plugin transformer simplifies the time-consuming and expensive task of hardwiring a doorbell into a quick and simple process.
Indoor Power Adapter for Merkury Smart Wi-Fi Doorbell
As part of the installation process, I tried out a couple of different adaptors. However, it came out that not every adaptor was compatible with the Merkury video doorbell, so I resorted to my tried and true fallback.
After a long search, I discovered the OhmKat Professional Video Doorbell Power Supply, which seems to operate rather well with the doorbell.
To complete the installation, I connected the black and red wires at the back of the doorbell with a screwdriver and plugged the converter into a nearby power socket.
The Merkury WiFi doorbell is equipped with two silver screws, also known as terminals, located on the back.
The only thing you have to do is gently unscrew them, slide the bare wires below them, then tighten them back up.
It makes no difference which wire is used to connect to which terminal. After the screws are in place, plug in the adaptor to complete the installation.
When the connecting process is complete, the red light on the doorbell will illuminate, indicating that the connection was successful.
Extending the Adapter Wire for your Merkury Smart WiFi Doorbell if Necessary
To my surprise, the OhmKat converter only came with a 12-foot length cable, which was insufficient for my needs.
I was at least 2 feet away from the nearest power outlet when I realized what I had done. Fortunately, I had a 6-foot-long Doorbell Power Supply Extension Cord leftover from one of my earlier projects sitting around, which came in handy. I used it to lengthen the length of the wire that was used to connect the adaptor.
If your power outlet is more than 12 feet away from where you want to put your doorbell, you might consider purchasing an adaptor instead of wasting money on one.
If this is the case, there is no need to be concerned; an extension cord will care for the situation.
Install a Plugin Chime Instead of a Chime Box for your Merkury Smart WiFi Doorbell
It should be noted that while the video doorbell under consideration comes with its chime connector, you will not require it if you intend to connect your smart doorbell to an indoor power adaptor instead.
The chime connector is a little white box-like device included with the doorbell when unpacked.
The chime connector enables the doorbell to have its chime circuit, which is distinct from the circuit used by the analog doorbell.
Any power interferences caused by the already-installed chime box are prevented by using this device.
The plugin chime box offers the same functionality as the stand-alone model but with the added comfort of plugging it in.
In light of my decision to purchase the OhmKat adaptor, I opted to purchase the OhmKat Wireless Universal Video Doorbell Chime, a logical complement to the adaptor.
All required is that the chime is installed in the split connection between the doorbell and the adaptor.
In this manner, it can draw power directly from the adaptor, and you don’t have to plug anything else in separately.
The best aspect is that you won’t have to spend extra money on additional wiring. The TomKat adaptor is pre-installed with a split connection for connecting the chime box, which is a convenient feature.
How to Mount Your Merkury Smart Wi-Fi Doorbell?

One of the most difficult aspects of the entire process is mounting the doorbell on the wall.
In addition, I would recommend that you connect the doorbell to the Geeni app before hanging it.
Instead of having to awkwardly hang around in the hallway while trying to link your doorbell with your app, you can use this method instead.
The steps to connect to the app are outlined in the section below.
A stencil for installing the doorbell is not included with the doorbell purchase. As a result, to make drilling easier, I traced the hole locations on a sheet of paper and taped them to the wall.
My recommendation is to put the doorbell on the wall so that it is roughly 4 to 4.5 feet above the surrounding ground level.
This will make it easier for you to observe the expressions on the faces of the guests. This is also the height at which sensors operate at their most optimal performance.
The holes were drilled using a 9 mm drill bit. After drip, the holes, screw in the mount and position the doorbell on top to complete the installation.
I didn’t want to drill a hole through the wall to put the cables through it, so I avoided doing so. As a result, I purchased some circle cable hooks and put the cables under the house’s front door—the circle cable hooks on the back of each one help keep them in place.
To pass wires through the hole, use a larger drill bit to drill a hole between the two screw holes on the mount, rather than using a smaller drill bit.
Remove all of the debris and run the wires through the holes that have been created. To accomplish this, you will need to connect the wires to the terminals after they threaded through the opening.
Setting up Merkury Smart Wifi Doorbell with the Geeni App

The Geeni app, available on your smartphone, allows you to connect all of your Merkury items.
The connecting process is quite simple, and it just took a few minutes for me to get it connected to the app and running.
A red light will illuminate when you have successfully connected your doorbell. This indicates that the device is plugged in but that it is not currently connected to the WiFi network at this time.
The setup procedure is straightforward, and you can complete it by following the steps outlined below:
- Get the Geeni app from the Google Play Store or Apple App Store.
- Select the device to be added from the drop-down menu.
- Select the Smart doorbell category from the drop-down menu.
- You’ll be prompted to turn on your device at this point. Assuming it has already been activated, ignore this and proceed to the next step by pressing “next.” The absence of red light on your device (see below). Turn it on and pick ‘Next step’ from the drop-down menu.
- You will be prompted to confirm the WiFi connection you wish to use to connect your doorbell in a pop-up display.
- Following confirmation of your WiFi connection, a QR code will appear on the screen for your reference. Use your camera to take a picture of it. You will hear a beep, which indicates that the connection has been established.
In the future, you will be notified via the application whenever somebody rings your doorbell or if there is any movement near your main entrance.
Furthermore, the doorbell is equipped with a microphone and a speaker, while the app uses the speaker and microphone on your phone. You can also use the camera as an intercom system in this manner.
Conclusion
According to the product description, the Merkury smart WiFi doorbell with a camera is marketed as a system that must be connected to an existing doorbell system.
Suppose you have never set up a doorbell before. In that case, I can confirm that by utilizing a plugin adaptor and chime, you can complete the process in a matter of minutes, regardless of your experience with the device.
Using indoor power adapters, I’ve been able to install doorbells from Ring, Nest, SimpliSafe, and Zmodo without ever having to remove an existing doorbell.
At such a low price range, this Merkury Doorbell is a nifty little gadget, and I’m impressed they were able to include capabilities that are on par with those seen in more expensive competitors.
While I was gone from home, I used the doorbell to communicate with delivery personnel. I live in a community where porch pirates are a serious problem, and the Merkury doorbell allows me to advise couriers to place my products out of sight from the street.
Frequently Asked Questions

Does Merkury Smart Wifi Doorbell record?
The Merkury smart WiFi doorbell includes a recording option, but you must first insert a microSD card into the device for it to function.
Because the device records 1080p movies, it is recommended that you use an SD card with a minimum capacity of 16 GB.
Is Merkury and Geeni the same?
Geeni is a subsidiary of Merkury innovations that deal with smart home products. Hence, all Merkury WiFi products use the Geeni app to communicate with the user.
What devices work with the Geeni app?
All the smart products developed by Merkury innovations work with the Geeni app.

